Feeds:
Posts
Comments

Archive for the ‘Chocolate’ Category

Yes, I’m sharing something with a little green in it just in time to celebrate St. Patrick, but these amazing brownies can be made any time of year.

Truthfully, I was nervous about making them.  You see my friend Denise already makes what I consider to be a perfect mint brownie.  So why would I waste my time making something that couldn’t possibly compete?  I dunno.  Curiosity I guess.

The good news is that this recipe is different enough from my friend’s that I now have two favorites.  The most notable difference is in the brownie layer: this recipe’s brownie layer is definitely more thick, which, in the end, yields a taller brownie.  But the taste…well, it’s equally as good as my first favorite.

I recently took these to a baby shower and knew they were a sure success when one of the attendees declared, “These are even better than the BYU mint brownies.”  You alumni know what she’s talking about.  The chocolate and mint really become best friends in this recipe and make the most delicious sweet treat.

So, bookmark, pin, or just get into your kitchen to make some mint brownies.  You won’t be disappointed!

Mint Brownies
adapted from SavvyGirl & Company

printer friendly recipe

For the brownie layer:
2 cups sugar
1 cup butter, softened
4 eggs
4 (1-ounce) squares unsweetened chocolate, melted and slightly cooled
2 ½ cups flour
¼ teaspoon salt
¼ teaspoon baking powder
2 teaspoons vanilla

Mint Frosting:
4 tablespoons butter, softened
2 tablespoons evaporated milk
2 cups powdered sugar
½ teaspoon peppermint extract
1 teaspoon vanilla extract
Few drops green or red food coloring

Glaze Topping:
6 tablespoons butter
1 cup semi-sweet chocolate chips
2 teaspoons vanilla

Heat oven to 325.  Grease a 9×13 baking pan.  In large bowl, cream sugar and butter until fluffy. Beat in eggs until well-blended; then add melted chocolate. Mix dry ingredients and add to creamed mixture along with vanilla.

Bake for 28-32 minutes, or until no imprint is left when touched or a toothpick inserted into the center comes out clean. Do not overbake.

Mix mint frosting ingredients until creamy and spread on cooled brownies. Refrigerate 1 hour.

For glaze, combine butter and chocolate chips in top of double boiler. Add the vanilla and blend thoroughly. Pour gently over the mint frosting and spread by tipping pan; refrigerate until glaze is set.

Read Full Post »

Recently, my friend’s husband hired me to make her birthday cake, requesting only that it be “chocolate and good.”

That meant I had lots of options.  Since I had recently created some chocolate cake goodness for the auction, I had an idea.

I used THIS cake as my inspiration, keeping the cake and ganache parts the same, but changing up the frosting a bit.

Instead of strawberries, I put about 15 Oreos in the food processor, pulsed them until finely ground, and folded them into the frosting.

Wow, that’s some creamy, Oreo deliciousness.

And the finished product doesn’t look too bad either.

A reminder too, that if you don’t have 3 6-inch pans like the cake recipe calls for, use two 8-inch ones.  Your result will still be amazing, just not quite as tall and skinny.

Cookies and Cream Swiss Meringue Buttercream
inspired by Sweetapolita

printer friendly recipe

Yield: ~5 cups

5 large, fresh egg whites (150 g/5 oz)
1 1/4 cups (250 g/9 oz) sugar
3/4 lb (3 sticks/340 g/12 oz) butter, cut into cubes and cool, but not cold
2 teaspoons (10 mL) pure vanilla extract
15 Oreos, finely crushed
pinch of salt

Wipe the bowl of an electric mixer with paper towel and lemon juice, to remove any trace of grease.

Add egg whites and sugar, and simmer over a pot of water (not boiling), whisking constantly but gently, until temperature reaches 150°F, or if you don’t have a candy thermometer, until the sugar has completely dissolved and the egg whites are hot.

With whisk attachment of mixer, begin to whip until the meringue is thick, glossy, and the bottom of the bowl feels neutral to the touch (this can take up to 10 minutes or so). *Don’t begin adding butter until the bottom of the bowl feels neutral, and not warm.

Switch over to paddle attachment and, with mixer on low speed, add butter cubes, one at a time, until incorporated, and mix until it has reached a silky smooth texture (if curdles, keep mixing and it will come back to smooth). *If mixture is too runny, refrigerate for about 15 minutes and continue mixing with paddle attachment until it comes together.

Add vanilla and salt, continuing to beat on low speed until well combined.

Add the crushed Oreos, and blend until combined.

Read Full Post »

I hate photographing inside with florescent lighting and having to use a flash.

Gross.

But it’s the best I could do.  By the time the cake was complete the sun was on it’s way down, a one year-old was incessantly pulling on my pant leg and we had to get this creation to the auction.

And that’s where the bad lighting and photographing took place.

So I made this cake for the silent auction/dinner we had at church on Friday.  The winner not only took home the cake, but also four more desserts of their choosing to be delivered once per week for the next month.  I’ve done something like this every year since we’ve been a part of the auction, and it’s always exciting to see who the winner is and what sweet treats I get to create for them.

One of the reasons I like this cake is its size: just six inches in diameter.  So it’s not a huge triple layer cake.  And each of those layers get cut in half so even though it’s a pretty tall cake, it’s still not huge.   If you don’t have six inch cake pans, however, just use two nine-inch pans and increase the baking time a little.

The frosting is amazing.  This was my first attempt at swiss meringue buttercream, and I’m SOLD.

So. incredibly. good.

(and not hard at all.)

While I have not sampled this amazing creation in its ‘sliced,’ fully assembled form, I can report that all of the components: cake, buttercream and glaze are DElicious. I had to sample to make sure the cake was worth auctioning, right?

I made just one adaptation from Sweetapolita’s original creation, replacing the coffee in the chocolate cake for just hot water.  Her awesome post can be found HERE.  And she has a WAY better picture too.

For ease of printing, I have created a printer friendly recipe of all three components of the recipe.

I just finished making a second one for a sweet husband who saw the cake at the auction and ordered one to surprise his wife for Valentine’s Day. I know, time is short, but you can get this made for someone you love!  Try it.

Read Full Post »

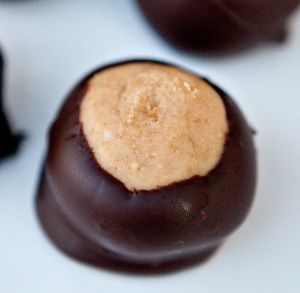
Buckeyes

This post comes with a shout out to my sister-in-law Becky, who lives entirely too far away — in Ohio.  Man, we miss her.

She got married this past summer to and Ohio State grad, which means she too is now a Buckeye.  It’s funny how all of us now are just a little more tuned into Buckeye life: sports scores, events and even controversy (um, hello Tresselmania).  While most of us in the family still claim to bleed blue, I think we like that Becky and Terry have made us fans of another university as well.  Although I don’t think all of us will be carrying a real buckeye around in our pocket like a certain someone sometimes does. 🙂

We attended the annual family Christmas party over the weekend, so I made Buckeyes for the occasion.  I mean, if part of our family can’t be there, they should at least be represented, right?  Even if it is only in dessert.

I’ve wanted to make this recipe for a while.  It comes from the second cookbook from those genius bakers at Baked in New York City.  Heaven help me the next time I get to New York.  I’ve got a list of bakeries to visit that is far too long.  And Baked is at the top.

If you look at other recipes for Buckeyes, they typically call for twice the amount of sugar that this one does.  This recipe also includes crushed graham crackers, which deviates from the ‘traditional’ one.  But you know what?  The result is phenomenal.

Not just delicious.  Like over the top awesomeness.  It’s such a good blend of peanut butter and chocolate.

I struggle when it comes to dipping things in chocolate, so after reading a few tips from different bloggers I inserted toothpicks into each peanut butter ball and put the tray in the fridge.  After about 20 minutes the peanut butter balls were dipped in chocolate and the toothpick was removed.  Once the chocolate hardened I just barely got my fingertip wet and rubbed it on the spot where the toothpick had created a hole.  Voila!  The hole was gone.

I’m leaving all of that out of the printable recipe, because you’re probably a lot more skilled at dipping than me.  But, if not, this is a pretty foolproof method.  Think ‘dipping for dummies.’

Buckeyes
Slightly adapted from Baked Explorations

1/4 cup (2 ounces) cream cheese, softened
1 1/2 cups smooth peanut butter
1 cup graham cracker crumbs
1/4 teaspoon salt
1 teaspoon vanilla extract
3 cups powdered sugar
10 tablespoons unsalted butter, melted and cooled
12 ounces dark chocolate (60 to 72%), coarsely chopped

Make the filling: In the bowl of an electric mixer, beat the cream cheese and peanut butter together until combined. Add the graham cracker crumbs and beat for 10 seconds. Add the sugar, vanilla  and butter, and mix on the lowest speed until it stops floating off everywhere, then increase the speed until the ingredients are combined. Scrape down the whole bowl well, then mix again. The mixture will be quite sturdy and a little dry — perfect for shaping. Set it aside while you prepare the coating.

Make the coating: Melt the chocolate either over a double boiler, stirring until it is completely smooth or in a microwave in 30 then 10 second increments, stirring before you start it again until it is completely smooth. Let it cool a bit while you shape the peanut butter centers.

Assemble the candies: Line a sheet pan with parchment paper. Scoop out slightly more than one tablespoon’s worth of filling (I used my smallest cookie dough scoop). Use your hands to form it into a ball. Place the ball on the prepared sheet and repeat the process until all of the candies have been shaped. They can sit close to each other but make sure they are not touching.

Using a fork or large skewer, dip each ball into the chocolate and roll it about so that almost the entire candy is coating, leaving a small circle uncoated.

Chill the buckeyes until they are set, about 30 minutes.

Read Full Post »

Take a look at that: cheesecake sandwiched perfectly between two layers of cookie.

The result? Well, it’s just a bit of deliciousness that takes on a mean addiction.  Just eating one to sample was nearly impossible.

I’ve done the cheesecake and chocolate chip cookie combination before.  This recipe, however is far more focused on the cookie with a little bit of cheesecake.  I like that.  Wait, I liked the other one too.

What can I say? It’s just a good combination.

Make a double batch and really spread some holiday sweetness to those you love!

Cheesecake Chocolate Chip Cookie Bars
adapted from King Arthur Flour

printer friendly version

Chocolate chip cookie layer:
1/2 cup unsalted butter, softened
1/2 cup butter flavored vegetable shortening
1 cups brown sugar
1/2 cup granulated sugar
2 teaspoon vanilla extract
3/4 teaspoon salt
1 tablespoon apple cider vinegar
1 egg
1 teaspoon baking soda
2 cups all-purpose flour
2 cups semisweet chocolate chips

Cheesecake layer:

1 package (8 oz) cream cheese, room temperature
1/2 cup sugar
1 egg
1/2 teaspoon vanilla

Heat oven to 350. Cream together the butter, shortening, sugars, vanilla, salt and vinegar. Beat in the egg, then the baking soda and flour. Stir in the chocolate chips. Divide the dough into two equal portions and set aside.

In a medium mixing bowl cream the cream cheese with the sugar until thoroughly combined. Beat in the egg and vanilla.

In a 9×13 pan, spread 1/2 of the cookie dough mixture evenly across the bottom.
* This is a tricky step.  Be patient with the process.  It’s not like you’re pouring cake batter in.  Remember, this is cookie dough…and the chocolate chips are no help when it comes to spreading the dough out.

Spread the cream cheese mixture on the top of the cookie dough. With the remaining cookie dough, flatten chunks of dough between your hands into discs, and then place on top of the cream cheese mixture. The dough discs don’t have to touch, just place them near each other so they cover the surface as well as possible.

Bake for 30-40 minutes, until the top is brown and cooked through. Cool completely and store in the refrigerator.  Cut into bars and enjoy!

Read Full Post »

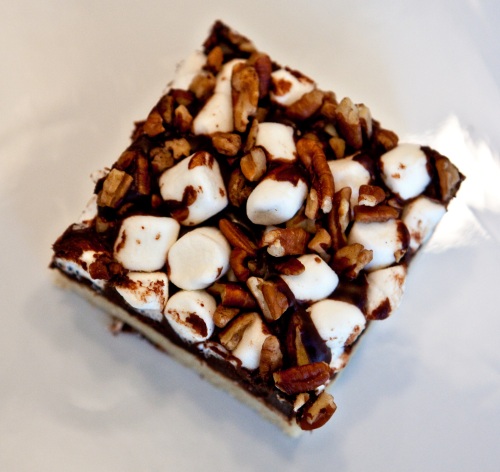
Rocky Road Bars

So, I thought I’d take a couple of weeks off from blogging and before I knew it, a couple of months had gone by.  Seriously, how it is possibly almost Thanksgiving?

I have been cooking and baking…just not blogging much.  But I do have to say that this is by far the sweetest pumpkin creation this season:

I’m coming back, just in time for the holiday season with a few new recipes that are simple, but do not disappoint.  Who doesn’t love simple at this crazy time of year?  Thanks for sticking with me.

This recipe for Rocky Road bars is rich and delicious.  The shortbread crust balances out the richness of the chocolate just perfectly.

If you’re one of those thoughtful bakers who makes a variety of treats to plate and deliver to friends, consider adding this recipe into your stack of must-bake items for the holidays.

Rocky Road Bars
adapted from King Arthur Flour

printer friendly recipe

For the crust:
1 cup (2 sticks) butter, salted
1/2 teaspoon salt*
3/4 cup sugar
2 teaspoons vanilla extract
2 1/3 cups flour
*If you use unsalted butter, increase the salt in the recipe to 1 teaspoon.

For the topping:
3 cups chopped semisweet or dark chocolate or chocolate chips
3/4 cup heavy cream
1 cup toasted diced pecans
3 cups mini marshmallows

Heat the oven to 300.  Line a 9×13 pan with foil and grease the foil. (Or just grease the pan.  Using foil is a personal preference because then I can lift the foil out and cut the bars easier.)

In a medium-sized bowl, beat together the butter, salt, sugar, and vanilla, then beat in the flour. The dough will seem very dry, and won’t seem to want to become together at first.

Press the dough into the prepared pan, smoothing the surface with your fingers.  Prick the dough all over with a fork to  keep it from bubbling up as it bakes.

Bake the crust for 35 to 40 minutes, or until it’s golden brown around the edges and beginning to brown on the top. Make the topping while the shortbread begins to cool.

Place the chocolate and cream in a microwave-safe bowl, or in a saucepan. Heat in the microwave, or over low heat on a burner, until the cream is steaming and barely beginning to form bubbles.

Remove from the heat, and stir. The chocolate will gradually form a lump in the center of the bowl, then will start to expand as it absorbs the cream. Eventually the chocolate and cream will become one.  Keep stirring until it’s very smooth. It WILL all come together.  If all the chocolate doesn’t seem melted, reheat very briefly, and keep stirring.

Spread the warm chocolate atop the cookie crust. Sprinkle with the marshmallows, then the pecans.

Cover the pan, and place the bars in the refrigerator for about 15 to 20 minutes, to set the chocolate a bit. Using a sharp knife cut into bars.

Read Full Post »

Mint Chocolate Cookies

Remember that BIG cookie project I mentioned in the last post?  Well, here’s the scoop:  my sweet sister-in-law, Becky, got married last weekend. Oh, she looked beautiful.
That’s her with my other awesome sister-in-law, Annie.  I love having sisters.

It was an incredible, lovely, delicious celebration.

Speaking of delicious, doesn’t this little guy look sweet enough to eat?  Seriously, how can he possibly be 6 months already?

Becky had a great idea to incorporate cookies into the candy table, so I started baking.   The end result was four different varieties, yielding…37 dozen cookies.

Yes, 37 dozen.

Two of those varieties, peanut butter and snickerdoodle, have already been shared on the blog.

Check out this creative assortment:


See that large jar in the back with the chocolate cookie?  Well, that’s today’s featured recipe.

Regrettably, in my haste to make and store all of these sweet treats, I somehow missed photographing this cookie.  Remember…37 dozen.

The original recipe  calls for white chocolate chips instead of anything mint.  And, they’re good that way.  Really good.  Becky, however, requested mint, and what the bride wants, the bride definitely gets.

After looking at three grocery stores for mint chips (are they just a holiday thing?), I gave up and settled for chopping up Andes mints.  It worked out perfectly though because the mint flavor was throughout more of the cookie.  I also added in some semi sweet chocolate chips so the cookie didn’t have such a flat appearance.

So, you’ve got options.  If mint is your thing, try them Becky’s way.  If mint in a cookie sounds like a horrible baking mistake to you, try it with white, peanut butter, or chocolate chips.  Even toffee bits would probably be good.

Oh, and one more thing, this recipe doesn’t have eggs, so eat up as much dough as you’d like.  Although, when has a little raw egg stopped you from sampling cookie dough?

Mint Chocolate Cookies
printer friendly recipe

Ingredients:
1 ¼ cups flour
1 teaspoon baking powder
½ teaspoon salt
⅔ cup dutch-process cocoa
½ cup (1 stick) unsalted butter, cubed and room temp
½ cup white sugar
½  cup dark brown sugar
1 ½ teaspoons vanilla
⅓ cup milk
1 cup chopped Andes Mints
½ cup semi-sweet chocolate chips

Heat oven to 325.

Whisk together flour, salt, baking powder and cocoa, and set aside.

Beat the butter on medium-high until light and add sugars, creaming well. Add the vanilla and beat until smooth.
Add the flour mixture in 2 batches, alternately with the milk in one batch, mixing well. Chill dough for 15 minutes.

Drop the dough in heaping tablespoonfuls onto a baking sheet. Bake for 10-12 minutes or until the edges are firm.  Cool on baking sheets and transfer to cooling rack.


Read Full Post »

Not much to say about these, except that they’re sweet, rich and addictive.  Just one square doesn’t seem like enough.  You’ll want more, I promise.

Oh, and since I rarely use butterscotch chips and had some extra caramel laying around, I chopped that up instead and tossed it in.

That’s the beauty of bars like this.  Just throw in whatever you like (or whatever happens to be in your pantry) and you’re pretty much guaranteed a success…in about 30 minutes!

Hello Dolly Bars
printer friendly recipe

Ingredients:
½ cup (1 stick) salted butter, cut into large pieces
1½ cups graham crackers crumbs (about 8 graham crackers, pulsed in a food processor)
1½ cups chocolate chips
1 cup butterscotch chips (I used caramel pieces instead)
1 cup shredded coconut
1 cup pecans, coarsely chopped
1/3 cup sweetened condensed milk (just under half a small can)

Heat oven to 350.  Melt the butter in microwave and then add the graham cracker crumbs. Mix and then press evenly into the bottom of 8×8 baking pan.

Layer coconut, pecans, butterscotch and chocolate chips on top of graham cracker base. Pour sweetened condensed milk over whole mixture.

Bake in oven for 25 to 30 minutes or until the top is light brown.

Let cool in pan for at least half an hour, cut into bars and serve.

Read Full Post »

Chocolate added to an already delicious rice krispies treat? Yes please.

Rice Krispies treats are one of those “I could eat the whole pan” treats for me.  I haven’t tried it, but I’m pretty sure I could finish off a 9 x13 of them.  Adding chocolate made it even more difficult to forebear and sample, instead of inhale.

This recipe is made in a square pan, which will result in an impressive thick treat.  I was serving up these chocolate wonders to twelve of my favorite teenagers, so I simply doubled the batch and made it in a 9 x 13 pan.  But if you’d like something not quite so tall, just use the bigger pan and the single batch recipe.

Enjoy!

Dark Chocolate Rice Krispies Treats
adapted from Martha Stewart

printer friendly version

Ingredients:

6 tablespoons butter

1 bag (10 ½ ounces) mini marshmallows

¼  cup unsweetened Dutch-process cocoa (spooned and leveled)

½ teaspoon vanilla extract

6 cups rice krispies

2 ounces bittersweet or semi-sweet chocolate, melted

In a large saucepan melt the butter over low heat. Add marshmallows and cocoa. Stir until completely melted. Remove from heat.  Stir in vanilla.

Pour the marshmallow mixture over the cereal.  Stir until well coated.  If you spray your spoon or scraper with cooking spray your ‘sticky’ problems will decrease immensely!

Press the mixture into an 8 or 9 inch square pan coated with cooking spray.  Let cool.  Cut, serve and enjoy!

Read Full Post »

I’ve already shared my favorite chocolate chip cookie recipe with you, but it probably comes as no surprise that I have another one I like just as much.

I think it’s kind of like having a favorite child.

It’s o.k. to have 3 or 4 (or more) favorites, right?

This recipe really does create the perfect, classic chocolate chip cookie.  It varies just a bit from traditional baking by using melted butter, but doing so really makes all the difference.  Just make sure you give your butter a little time to cool down a bit after melting. Hot butter will not make for the perfect cookie.

One tip for cookie baking is to bake them just until you start to see the edges brown.  After removing from the oven, allow the cookies to finish off baking on the warm tray for about 5 minutes.  You’ll get soft, perfectly baked cookies every time!

Thick and Chewy Chocolate Chip Cookies
adapted from America’s Test Kitchen
printer friendly recipe

Ingredients:
2 cups, plus 2 tablespoons all-purpose flour
½ teaspoon baking soda
½ teaspoon salt
12 tablespoon (1½ sticks) butter, melted and cooled
1 cup packed light brown sugar
½ cup  granulated sugar
1 large egg
1 large egg yolk
2 teaspoon vanilla extract
1½ cups semisweet chocolate chips

Heat oven to 325.

Whisk the flour, baking soda, and salt together in a medium bowl.

In a large bowl, beat the melted butter and sugars together with an electric mixer on medium speed until smooth, 1 or 2 minutes. Beat in the egg, egg yolk, and vanilla until combined, scraping down the bowl and beater as needed.

Reduce the mixer speed to low and slowly add the flour mixture until combined, about 30 seconds. Mix in the chips until incorporated.

Drop cookie dough (about 2 tablespoonfuls each) onto baking sheets.  Bake the cookies until the edges are set and beginning to brown but the centers are still soft and puffy, about 14-16 minutes

Let the cookies cool on the baking sheet for 5 minutes.  Transfer to a wire rack and let cool completely.

Makes about 2 dozen cookies.

Read Full Post »

Older Posts »